| Главная » Файлы » Прочие скрипты » jQuery |
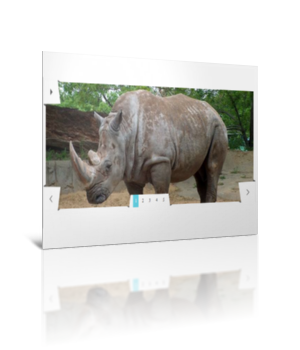
Стильный креативный слайдер на jQuery для вашего сайта uCoz
| 24.06.14, 18:58:46 | |
 Очень даже неплохой слайдер с очень оригинальным внешним видом и классными эффектами переходов Для начала посмотрите ДЕМО Моё тестирование в фидле: КЛИК Установка: В самый низ вашего css вставляйте: Код /** * Rhinoslider 1.04 * http://rhinoslider.com/ * * Copyright 2012: Sebastian Pontow, Rene Maas (http://renemaas.de/) * Dual licensed under the MIT or GPL Version 2 licenses. * http://rhinoslider.com/license/ */ .rhino-btn { background:url(/img/rhinoslider-sprite.png) 0 0 no-repeat; z-index:10; width:56px; height:53px; display:block; text-indent:-999%; -webkit-user-select:none; -moz-user-select:none; user-select:none; } .rhino-prev, .rhino-next { bottom:-4px; } .rhino-prev { left:-6px; background-position:-168px 0; } .rhino-next { right:-6px; background-position:-106px 0; } .rhino-prev:hover { background-position:-168px -53px; } .rhino-next:hover { background-position:-106px -53px; } .rhino-toggle { top:-4px; left:-6px; } .rhino-play { background-position:0 0; } .rhino-play:hover { background-position:0 -53px; } .rhino-pause { background-position:-56px 0; } .rhino-pause:hover { background-position:-56px -53px; } .rhino-container { position:relative; } .rhino-caption { position:absolute; background: #000; display:none; left:0; right:0; top:0; color:#fff; padding:10px; text-align:right; -webkit-user-select:none; -moz-user-select:none; user-select:none; } .rhino-bullets { position: absolute; bottom: -3px; left: 50%; margin:0 0 0 -50px; z-index: 10; background: #fff; padding:0; } .rhino-bullets:before, .rhino-bullets:after { position:absolute; display:block; left:-16px; content:' '; width:16px; height:26px; background:url(/img/rhinoslider-sprite.png) -224px 0 no-repeat; } .rhino-bullets:after { left:auto; right:-16px; background-position: -240px 0; } .rhino-bullets li { float:left; display:inline; margin:0 2px; } .rhino-bullets li a.rhino-bullet { display: block; width: 16px; height: 15px; cursor: pointer; background: white; font-size: 10px; text-align: center; padding: 6px 0 5px 0; color: #333; text-decoration:none; -webkit-user-select:none; -moz-user-select:none; user-select:none; } .rhino-bullets li a.rhino-bullet:hover, .rhino-bullets li a.rhino-bullet:focus { color:#999; background:#eee; } .rhino-bullets li a.rhino-bullet.rhino-active-bullet { color:#fff; background:#5cd4e8; } #slider { width:600px; height:250px; /*IE bugfix*/ padding:0; margin:0; } #slider li { list-style:none; } Следующий код вставляйте после < /head >: Код <script src="/js/rhinoslider-1.04.min.js"></script> <script src="/js/mousewheel.js"></script> <script src="/js/easing.js"></script> <script> $(document).ready(function () { $('#slider').rhinoslider({ animateActive:true, // Нужно ли анимировать слайд (true, false) effect: 'shuffle', // Эффект ('none', 'fade', 'slide', 'kick', 'transfer', 'shuffle', 'explode', 'turnOver', 'chewyBars') easing:'swing', // Тип сглаживания анимации partDelay:100, // Задержка между анимацией слайдов. Любое целое число parts:'5,3', // На сколько частей будет разлетаться слайд shiftValue:'150', // Дистанция между кусочками слайда showTime:3000, // Задержка между сменой слайда slideNextDirection:'toRight', // Тип сдвига анимации при клике "Вперёд" ('toLeft', 'toRight', 'toTop', 'toBottom') slidePrevDirection:'toLeft' // Тип сдвига анимации при клике "Назад" ('toLeft', 'toRight', 'toTop', 'toBottom') }); }); </script> Следующий код в то место, где будет сам слайдер: Код <div id="page"> <ul id="slider"> <li> <img src="Ссылка на картинку" alt="" /> </li> <li> <img src="Ссылка на картинку" alt="" /> </li> <li> <img src="Ссылка на картинку" alt="" /> </li> <li> <img src="Ссылка на картинку" alt="" /> </li> <li> <img src="Ссылка на картинку" alt="" /> </li> </ul> </div> ЗДЕСЬ вы найдёте более подробную документацию по работе со слайдером Три скрипта из прикреплённого архива залейте в папку js, а картинку в папку img За основу взята ЭТА статья Материал подготовлен Apocalypse | |
| Просмотров: 641 | Загрузок: 0 | | |
| Всего комментариев: 0 | |
|
| |