| Главная » Файлы » Прочие скрипты » jQuery |
Индикаторы загрузки на кнопках через CSS3 и jQuery 1.10.2 для uCoz
| 01.07.14, 15:18:53 | |
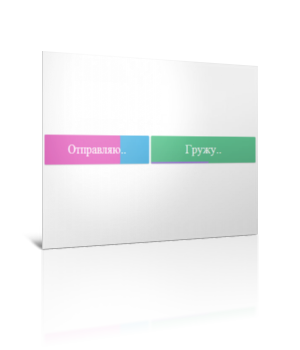 Отличный повод испытать всю мощь CSS3 и jQuery 1.10.2. Данное решение позволит вам выводить на кнопочках индикатор загрузки, что позволит визуально отобразить загрузку, отправку и т.д. Для начала посмотрите ДЕМО Моё тестирование в фидле: КЛИК Установка: Пользователям uCoz в ПУ -- Настройки нужно активировать jQuery 1.10.2 После < /head > на нужных страницах вставляйте: Код <script> $(document).ready(function () { // Convert all the links with the progress-button class to // actual buttons with progress meters. // You need to call this function once the page is loaded. // If you add buttons later, you will need to call the function only for them. $('.progress-button').progressInitialize(); // Listen for clicks on the first three buttons, and start // the progress animations $('#submitButton').click(function (e) { e.preventDefault(); // This function will show a progress meter for // the specified amount of time $(this).progressTimed(2); }); $('#actionButton').click(function (e) { e.preventDefault(); $(this).progressTimed(2); }); $('#generateButton').one('click', function (e) { e.preventDefault(); // It can take a callback var button = $(this); button.progressTimed(3, function () { // In this callback, you can set the href attribute of the button // to the URL of the generated file. For the demo, we will only // set up a new event listener that alerts a message. button.click(function () { alert('Showing how a callback works!'); }); }); }); // Custom progress handling var controlButton = $('#controlButton'); controlButton.click(function (e) { e.preventDefault(); // You can optionally call the progressStart function. // It will simulate activity every 2 seconds if the // progress meter has not been incremented. controlButton.progressStart(); }); $('.command.increment').click(function () { // Increment the progress bar with 10%. Pass a number // as an argument to increment with a different amount. controlButton.progressIncrement(); }); $('.command.set-to-1').click(function () { // Set the progress meter to the specified percentage controlButton.progressSet(1); }); $('.command.set-to-50').click(function () { controlButton.progressSet(50); }); $('.command.finish').click(function () { // Set the progress meter to 100% and show the done text. controlButton.progressFinish(); }); }); // The progress meter functionality is available as a series of plugins. // You can put this code in a separate file if you want to keep things tidy. (function ($) { // Creating a number of jQuery plugins that you can use to // initialize and control the progress meters. $.fn.progressInitialize = function () { // This function creates the necessary markup for the progress meter // and sets up a few event listeners. // Loop through all the buttons: return this.each(function () { var button = $(this), progress = 0; // Extract the data attributes into the options object. // If they are missing, they will receive default values. var options = $.extend({ type: 'background-horizontal', loading: 'Loading..', finished: 'Done!' }, button.data()); // Add the data attributes if they are missing from the element. // They are used by our CSS code to show the messages button.attr({ 'data-loading': options.loading, 'data-finished': options.finished }); // Add the needed markup for the progress bar to the button var bar = $('<span class="tz-bar ' + options.type + '">').appendTo(button); // The progress event tells the button to update the progress bar button.on('progress', function (e, val, absolute, finish) { if (!button.hasClass('in-progress')) { // This is the first progress event for the button (or the // first after it has finished in a previous run). Re-initialize // the progress and remove some classes that may be left. bar.show(); progress = 0; button.removeClass('finished').addClass('in-progress') } // val, absolute and finish are event data passed by the progressIncrement // and progressSet methods that you can see near the end of this file. if (absolute) { progress = val; } else { progress += val; } if (progress >= 100) { progress = 100; } if (finish) { button.removeClass('in-progress').addClass('finished'); bar.delay(500).fadeOut(function () { // Trigger the custom progress-finish event button.trigger('progress-finish'); setProgress(0); }); } setProgress(progress); }); function setProgress(percentage) { bar.filter('.background-horizontal,.background-bar').width(percentage + '%'); bar.filter('.background-vertical').height(percentage + '%'); } }); }; // progressStart simulates activity on the progress meter. Call it first, // if the progress is going to take a long time to finish. $.fn.progressStart = function () { var button = this.first(), last_progress = new Date().getTime(); if (button.hasClass('in-progress')) { // Don't start it a second time! return this; } button.on('progress', function () { last_progress = new Date().getTime(); }); // Every half a second check whether the progress // has been incremented in the last two seconds var interval = window.setInterval(function () { if (new Date().getTime() > 2000 + last_progress) { // There has been no activity for two seconds. Increment the progress // bar a little bit to show that something is happening button.progressIncrement(5); } }, 500); button.on('progress-finish', function () { window.clearInterval(interval); }); return button.progressIncrement(10); }; $.fn.progressFinish = function () { return this.first().progressSet(100); }; $.fn.progressIncrement = function (val) { val = val || 10; var button = this.first(); button.trigger('progress', [val]) return this; }; $.fn.progressSet = function (val) { val = val || 10; var finish = false; if (val >= 100) { finish = true; } return this.first().trigger('progress', [val, true, finish]); }; // This function creates a progress meter that // finishes in a specified amount of time. $.fn.progressTimed = function (seconds, cb) { var button = this.first(), bar = button.find('.tz-bar'); if (button.is('.in-progress')) { return this; } // Set a transition declaration for the duration of the meter. // CSS will do the job of animating the progress bar for us. bar.css('transition', seconds + 's linear'); button.progressSet(99); window.setTimeout(function () { bar.css('transition', ''); button.progressFinish(); if ($.isFunction(cb)) { cb(); } }, seconds * 1000); }; })(jQuery); </script> В самый низ вашего css вставляйте: Код div.control-area { font: bold 14px'Raleway', sans-serif; background-color: #f3f3f3; padding: 20px; border-radius: 5px; width: 400px; color:#888; } div.control-area a { display: inline-block; cursor: pointer; margin: 7px auto; background-color: #fdfdfd; border-radius: 2px; padding: 8px 10px; font-size: 13px; text-transform: uppercase; } div.control-area a:hover { background-color: #fff; box-shadow:0 1px 1px #dfdfdf; } /*------------------------- The buttons --------------------------*/ .progress-button { display: inline-block; font-size:24px; color:#fff !important; text-decoration: none !important; padding:14px 60px; line-height:1; overflow: hidden; position:relative; box-shadow:0 1px 1px #ccc; border-radius:2px; background-color: #51b7e6; background-image:-webkit-linear-gradient(top, #51b7e6, #4dafdd); background-image:-moz-linear-gradient(top, #51b7e6, #4dafdd); background-image:linear-gradient(top, #51b7e6, #4dafdd); } /* Hide the original text of the button. Then the loading or finished text will be shown in the :after element above it. */ .progress-button.in-progress, .progress-button.finished { color:transparent !important; } .progress-button.in-progress:after, .progress-button.finished:after { position: absolute; z-index: 2; width: 100%; height: 100%; text-align: center; top: 0; padding-top: inherit; color: #fff !important; left: 0; } /* If the .in-progress class is set on the button, show the contents of the data-loading attribute on the butotn */ .progress-button.in-progress:after { content:attr(data-loading); } /* The same goes for the .finished class */ .progress-button.finished:after { content:attr(data-finished); } /* The colorful bar that grows depending on the progress */ .progress-button .tz-bar { background-color:#e667c0; height:3px; bottom:0; left:0; width:0; position:absolute; z-index:1; border-radius:0 0 2px 2px; -webkit-transition: width 0.5s, height 0.5s; -moz-transition: width 0.5s, height 0.5s; transition: width 0.5s, height 0.5s; } /* The bar can be either horizontal, or vertical */ .progress-button .tz-bar.background-horizontal { height:100%; border-radius:2px; } .progress-button .tz-bar.background-vertical { height:0; top:0; width:100%; border-radius:2px; } /*---------------------------- Color themes -----------------------------*/ .progress-button.red { background-color: #e6537d; background-image:-webkit-linear-gradient(top, #e6537d, #df5179); background-image:-moz-linear-gradient(top, #e6537d, #df5179); background-image:linear-gradient(top, #e6537d, #df5179); } .progress-button.red .tz-bar { background-color:#6876b4; } .progress-button.green { background-color: #64c896; background-image:-webkit-linear-gradient(top, #64c896, #5fbd8e); background-image:-moz-linear-gradient(top, #64c896, #5fbd8e); background-image:linear-gradient(top, #64c896, #5fbd8e); } .progress-button.green .tz-bar { background-color:#9e81d6; } Примеры кнопок: 1. Кнопка "отправить": Код <a id="submitButton" data-loading="Отправляю.." data-finished="Готово!" href="#" class="progress-button">Отправить</a> 2. Кнопка "загрузить": Код <a id="actionButton" href="#" class="progress-button green" data-loading="Гружу.." data-finished="Готово!" data-type="background-bar">Загрузить!</a> 3. Кнопка "сгенерировать": Код <a id="generateButton" href="#" class="progress-button red" data-loading="Генерирую..." data-finished="Скачать" data-type="background-vertical">Сгенерировать</a> 4. Пример ручного управления загрузчиком кнопки: Код <a id="controlButton" data-loading="Гружу.." data-finished="Готово!" href="#" class="progress-button">Старт</a> <div class="control-area"> <a class="command increment">+10%</a> <a class="command set-to-1">1%</a> <a class="command set-to-50">50%</a> <a class="command finish">100%</a> </div> Источник: КЛИК Материал подготовлен Apocalypse | |
| Просмотров: 754 | Загрузок: 0 | | |
| Всего комментариев: 0 | |
|
| |