| Главная » Файлы » Прочие скрипты » jQuery |
Галерея с офигенскими эффектами переходов на CSS3 и jQuery для вашего сайта
| [ Скачать с сервера (6.5 Kb) ] | 01.07.14, 15:53:10 |
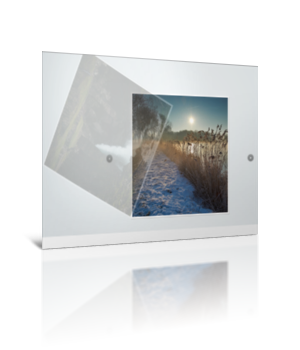 Очень даже неплохое решение для мини-слайдера изображения. Лично меня эффекты переходов очень впечатлили Для начала посмотрите ДЕМО Моё тестирование в фидле: КЛИК Установка: После < /head > на нужных страницах вставляйте: Код <link href="/css/animate.css" rel="stylesheet" /> <script> $(function () { var exits = ['fadeOut', 'fadeOutDown', 'fadeOutUpBig', 'bounceOut', 'bounceOutDown', 'hinge', 'bounceOutUp', 'bounceOutLeft', 'rotateOut', 'rotateOutUpLeft', 'lightSpeedOut', 'rollOut']; var entrances = ['fadeIn', 'fadeInDown', 'fadeInRight', 'bounceIn', 'bounceInRight', 'rotateIn', 'rotateInDownLeft', 'lightSpeedIn', 'rollIn', 'bounceInDown']; var photos = $('#photos'), ignoreClicks = false; $('.arrow').click(function (e, simulated) { if (ignoreClicks) { // If clicks on the arrows should be ignored, // stop the event from triggering the rest // of the handlers e.stopImmediatePropagation(); return false; } // Otherwise allo this click to proceed, // but raise the ignoreClicks flag ignoreClicks = true; if (!simulated) { // Once the user clicks on the arrows, // stop the automatic slideshow clearInterval(slideshow); } }); // Listen for clicks on the next arrow $('.arrow.next').click(function (e) { e.preventDefault(); // The topmost element var elem = $('#photos li:last'); // Apply a random exit animation elem.addClass('animated') .addClass(exits[Math.floor(exits.length * Math.random())]); setTimeout(function () { // Reset the classes elem.attr('class', '').prependTo(photos); // The animation is complate! // Allow clicks again: ignoreClicks = false; }, 1000); }); // Listen for clicks on the previous arrow $('.arrow.previous').click(function (e) { e.preventDefault(); // The bottom-most element var elem = $('#photos li:first'); // Move the photo to the top, and // apply a random entrance animation elem.appendTo(photos) .addClass('animated') .addClass(entrances[Math.floor(entrances.length * Math.random())]); setTimeout(function () { // Remove the classess elem.attr('class', ''); // The animation is complate! // Allow clicks again: ignoreClicks = false; }, 1000); }); // Start an automatic slideshow var slideshow = setInterval(function () { // Simulate a click every 1.5 seconds $('.arrow.next').trigger('click', [true]); }, 1500); }); </script> В самый низ вашего css вставляйте: Код #photos { margin:0 auto; padding-top:120px; width:450px; position:relative; } #photos li { position:absolute; width:450px; height:450px; overflow:hidden; background-color:#fff; box-shadow: 1px 1px 1px #ccc; z-index:10; -webkit-animation-duration: 1s; -moz-animation-duration: 1s; animation-duration: 1s; } #photos li a { position:absolute; top:6px; left:6px; right:6px; bottom:6px; background-size: cover; text-indent:-9999px; overflow:hidden; } /*---------------------------- Previous / Next arrows -----------------------------*/ a.arrow { width:33px; height:33px; background:url('/img/arrows.png') no-repeat; position:absolute; top:340px; opacity:0.9; } a.arrow:hover { opacity:1; } a.arrow.previous { left:50%; background-position:0 0; margin-left:-340px; } a.arrow.next { right:50%; background-position:-33px 0; margin-right:-340px; } Галерею оформляем следующим образом: Код <ul id="photos"> <li> <a href="#" style="background-image:url(Ссылка на картинку)">Название картинки</a> </li> <li> <a href="#" style="background-image:url(Ссылка на картинку)">Название картинки</a> </li> <li> <a href="#" style="background-image:url(Ссылка на картинку)">Название картинки</a> </li> <li> <a href="#" style="background-image:url(Ссылка на картинку)">Название картинки</a> </li> </ul> <a href="#" class="arrow previous"></a> <a href="#" class="arrow next"></a> Стиль из прикреплённого архива вставляйте в папку css, картинку в папку img Источник: КЛИК Материал подготовлен Apocalypse | |
| Просмотров: 710 | Загрузок: 238 | | |
| Всего комментариев: 0 | |
|
| |